SJ Labs - SJPhone
|
STEP 1
Télécharger SOFTphone
pour RUNfone |
|
STEP 2
Après Installation, la configuration par défaut apparait.
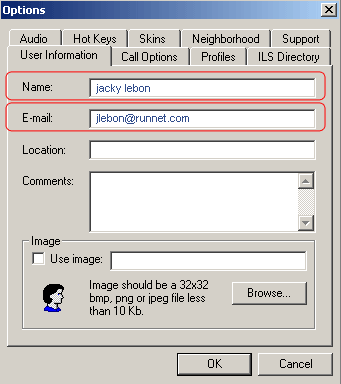
Clicker sur le symbole 'Vis' . La fenêtre *Options* window
apparait. Entrer votre nom et votre email dans 'User Information'
Tab. |
 |
|
STEP 3
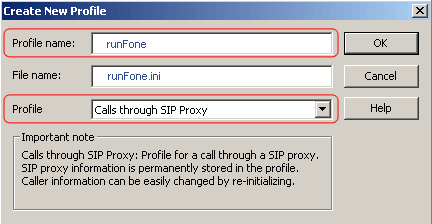
Clicker l'onglet 'Profiles' . Dans l'onglet Profile
clicker sur 'New'. Quand la fenêtre Create
New Profile' apparait, dans le 'Profile name:' entrer
RUNfone.com et dans le 'Profile' choisir 'Calls
through SIP Proxy' Puis clicker OK.
|
|
STEP 4
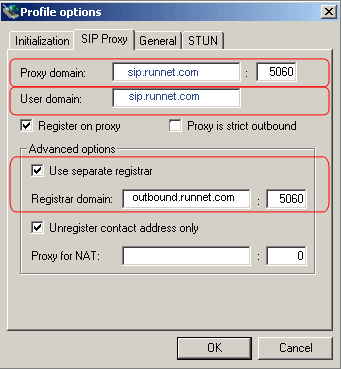
La fenêtre 'Profile options' apparait. Clicker sur l'onglet
SIP
Proxy . Entrer dans 'Proxy Domain:' sip.runnet.com et
entrer 5060 dans le champ à sa droite. Pour 'User domain:'
entrer
sip.runnet.com. Procéder ainsi selon le tableau ci contre .
Clicker OK. |
 |
|
STEP 5
De retour dans l'onglet 'Profiles' vous trouverez un profile
'RUNfone.com. Sélectionnez RUNfone.com et clicker sur
'Initialize.."
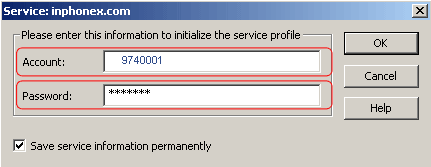
Une fenêtre 'Service:RUNfone.com' apparait . Entrer dans 'Account:'
votre N° de phone # et dans 'Password:' votre password
et clicker OK.
 |
|
STEP 6
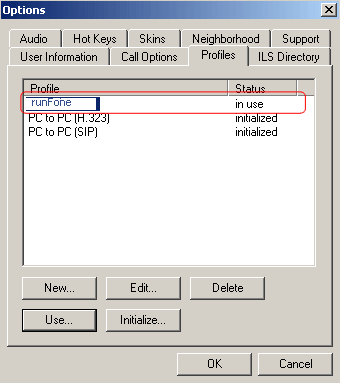
In the 'Profiles' Tab again highlight RUNfone.com profile
and then click on 'Use...'
Dans l'onglet 'Profiles' Sélectionnez encore le profile RUnfone.com et clicker sur 'Use...' |
 |
|
STEP 7
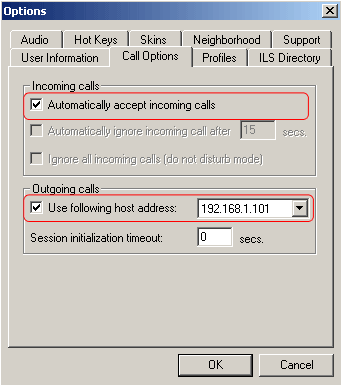
Clicker sur l'onglet 'Call Options' . Completer 'Incoming
Calls' en cochant 'Automatically accept
incoming calls'. Dans 'Outgoing calls' cochez
'Use following host address' et mettre l'adresse IP de votre Ordinateur.
|
 |
|
STEP 8
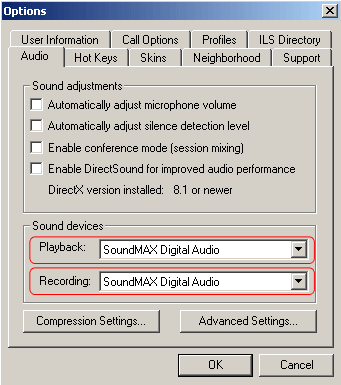
Click on 'Audio' Tab and make sure that in 'Sound devices'
the
Playback: is using your sound card audio.
Clicker OK.Clicker l'onglet'Audio' et completer 'Sound devices' Playback: avec votre carte son audio. Clicker OK.
|
 |
|
STEP 9
Vous pouvez appeler ! |
